Click

password not recognized

While operating in a network environment
Occasionally unable to log in to share folders
as stated
The shared folder password is not accepted as legitimate credentials. 

so that we may do the easy actions listed below to get it to function again.

open the registry edit and find the below key

HKEY_LOCAL_MACHINE\SYSTEM\CurrentControlSet\Control\Lsa


In the left pane of this registry location, highlight the Lsa key and come to its right pane. 

Then, right click in blank space and select 

New -> DWORD Value. Give the newly created DWORD (REG_DWORD) as LmCompatibilityLevel name double click on it to get this:

Logon-Failure-While-Joining-2


after that 

In the above shown Edit DWORD Value box, 

put the Value data equals to 

Click OK. 

You can now close Registry Editor and reboot the machine. 

After restarting your computer, 


you’ll be easily able to join the shared system.


Word to PDF Convertor

 A Word document may be easily converted to a PDF file

However, what happens if you need to convert a ton of Word files into PDFs? It will take a long time to open every file by hand and save it to PDF. 

You may quickly and easily convert large amounts of Word to PDF with the help of this method. And without utilizing any outside tools either. Ms. Word is all you need.

Copy the following code into Notepad or Notepad++, then save the file as "PDF.js" in a folder


var obj = new ActiveXObject("Scripting.FileSystemObject");

var docPath = WScript.Arguments(0);

docPath = obj.GetAbsolutePathName(docPath);


var pdfPath = docPath.replace(/\.doc[^.]*$/, ".pdf");

var objWord = null;


try

{

    objWord = new ActiveXObject("Word.Application");

    objWord.Visible = false;


    var objDoc = objWord.Documents.Open(docPath);


    var format = 17;

    objDoc.SaveAs(pdfPath, format);

    objDoc.Close();


    WScript.Echo("Saving '" + docPath + "' as '" + pdfPath + "'...");

}

finally

{

    if (objWord != null)

    {

        objWord.Quit();

    }

}


Copy the following code into Notepad or Notepad++ after opening it. Save the file in the same folder with the ".bat" extension, such as "PDF.bat."


echo off

for %%X in (*.docx) do cscript.exe //nologo PDF.js "%%X"

for %%X in (*.doc) do cscript.exe //nologo PDF.js "%%X"


Place all of your Microsoft Word documents in the same folder if they need to be converted to PDFs. 

It can have whatever name you like.

both PDF.js and PDF.bat will also in the same folder with those word files 


now run the bat file an stay a while


your all word docs will be save as PDF with one single click


Mount CIFS Share

Mounting a remote Windows share via CIFS is similar to mounting regular file systems. Follow the steps below to mount a CIFS share on Linux.

Step 1: Install CIFS Utilities Packages on Linux

The CIFS-Utils package provides the necessary utilities for mounting SMB/CIFS shares on a Linux system. The installation steps differ depending on which Linux distribution you are using.

For Debian-based systems:

First, update the local package repository to ensure the latest available package gets installed:

sudo apt update

Run the following command to install the CIFS-Utils package:

sudo apt install cifs-utils -y

For RHEL-based systems:

First, update the system repository:

yum update

Next, install the CIFS-Utils package by running the following command:

yum install cifs-utils

For Fedora:

Run the following command to update the package repository:

sudo dnf update

Install CIFS-Utils by running:

sudo dnf install cifs-utils

After the package installs, move on to the next section to create a mount point for the Windows share.

Step 2: Create a Directory to Mount Windows Share

To mount the Windows Share, create a directory on the Linux machine to act as a mount point for Windows Share. You can create this directory anywhere you want.

For this tutorial, we'll create a directory named winshare in the /mnt directory:

sudo mkdir /mnt/winshare

Step 3: Mount a CIFS Windows Share

After creating a directory, mount the Windows share. Use the following syntax:

sudo mount -t cifs //[IP_Address]/[share_name] /mnt/winshare -o username=[username]

Replace the [IP_Address], [share_name], and [username] with your details.

When prompted, enter your password and hit Enter.


After running the command and mounting the share, you should be able to access it from 

the /mnt/winshare directory on your Linux machine. 

Use the cd command to move to that directory and list the contents using ls


If you don't have access to the share, check if it is mounted correctly by running:

df -h 


If the share is correctly mounted, 

the output shows an entry for the remote Windows share 

and its mounted location on your Linux system.

Note: Check out our tutorial for mounting remote file systems over SSH.


Step 4: Make the Windows Share Automatically Mount at Boot

Make the Windows share mount automatically at boot to avoid mounting it after each system reboot. 

To do so, edit the /etc/fstab file using a Linux text editor. In this tutorial, we will use nano.

Follow the steps below:

1. Store your login credentials in a separate file for security reasons. Use this command to create a new file:

sudo nano /etc/cifs-credentials

2. Add your username and password to the file using the following format:

username=[username]

password=[password]

Replace [username] and [password] with your credentials.

Save and close the file.

3. Change the file permissions to prevent unauthorized changes or access:

sudo chmod 600 /etc/cifs-credentials

4. Open the /etc/fstab file:

sudo nano /etc/fstab

5. Add the following line at the end of the file:

//[IP_address]/[share_name] /mnt/winshare cifs credentials=/etc/cifs-credentials 0 0

Replace [IP_address] and [share_name] with your information.

Save and close the file. Your Windows share will now automatically mount when the system boots.


How to Unmount CIFS Windows Share

Unmount the Windows share from your Linux machine with the umount command:

sudo umount /mnt/winshare

The command unmounts the Windows share from the /mnt/winshare directory. If you used a different directory as the mount point during setup, specify that directory in the command.

If errors arise when unmounting the share, it may be because a user is currently accessing the share or a file is open.

Force unmount the share by running the following command:

sudo umount -f /mnt/winshare

The -f (--force) flag force unmounts the share from your system.

DNS Cache Flush

Lets see how to flush dns on Windows

if you are using Microsoft Windows this is the way to flush DNS cache 

you need to run as administrator when executing the command prompt


1.Press Windows+R keys and click Run.

2.Type cmd to open the Windows command prompt 

3.Type ipconfig /flushdns in command prompt and press enter.

4.after that trype ipconfig /renew

5.restart your computer 


that's it :D


Flash For EVONY 2021

Flash is now officially dead.  

with this way you can still use Flash.

if you have any problem while installing or working on this please feel free to contact me to help you

first we have to go to pale moon

https://www.palemoon.org/


Download and install PaleMoon


then lets go to adobe archive page 

https://web.archive.org/web/20200630185339/https://helpx.adobe.com/flash-player/kb/archived-flash-player-versions.html

go to bottom of the page until you find the 

Flash Player archives

this site is little bit slower than others 

Download this version,after May it is not working

   https://web.archive.org/web/20200630185339/https://fpdownload.macromedia.com/pub/flashplayer/installers/archive/fp_32.0.0.371_archive.zip


Unzip the archive and install the flash player for windows,

Goto control panel and find the flash adon there


Click on never check for updates 

then open your c drive  and search where adobe is get installed.

in here i am using windows 7 pc 

in windows 10 you have search in windows folder to get this


open adobe folder and look for flash player ,


go to adon and copy the things inside 


go to program files and find palemoon in there 


Go to Pale Moon\browser\extensions
paste  all to there


open palemoon and active flash 


i am playing evony and this is it

How to remove unwanted device drivers from your computer

 1.Right-click “Computer” on the Start menu (or on the desktop ) and choose Properties.

2. Click on “Advance System Settings” link, and then click on the “Environment Variables” button.


3. In the System Variables section click on the “New” button.

4. In the New System Variable dialog box, under the Variable Name value enter

devmgr_show_nonpresent_devices 

and give it a variable value of 1.

Click Ok.


i have done it here as you can see

after that log off and log back

or restarts computer

go to device manger and click on show hidden devices


then you can find the disabled  drives as follow with dim color


delete them so one by one


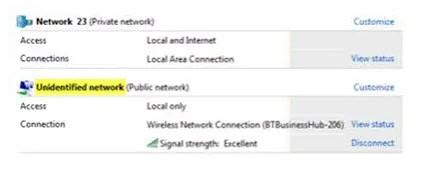
Unidentified Network in Windows 10

 You may face an issue with the network connectivity when trying to connect to the network, 

error says “Unidentified network“. 


I have compiled an exhaustive list of troubleshooting steps that could help. 


1.Turn off the Airplane mode

2.Update the Network Card drivers

3.Disable the security software temporarily

4.Switch off the Fast Startup feature

5.Change your DNS servers

6.Run these commands

7.Diagnose the network

8.Change the Ethernet cable

9.Set a static IP address

10.Use an external Network Adapter

11.Restart your modem and router

12.Upgrade the router firmware

13.Disable Virtual Network Adapters

14.Run the built-in Network troubleshooters.


Lets try to do the step 6 and 14 as others are usual things that you can do by your self as with your troubleshooting knowledge 

step 06 is here

Open ‘command prompt’ 
Basically these commands – 

renew the IP address, 
reset Winsock,
Flush DNS cache, 
and reset TCP/IP.


    ipconfig /release

    ipconfig /renew

    netsh winsock reset

    netsh int ip reset

    ipconfig /flushdns

    ipconfig /registerdns

    netsh int tcp set heuristics disabled

    netsh int tcp set global autotuninglevel=disabled
    
    netsh int tcp set global rss=enabled

    netsh int tcp show global


This is step 14

if not works lets try to Run the built-in Network troubleshooters
To open Internet Connections Troubleshooter:

msdt.exe -id NetworkDiagnosticsWeb

To open the Incoming Connections Troubleshooter

msdt.exe -id NetworkDiagnosticsInbound

To open the Network Adapter Troubleshooter:

msdt.exe -id NetworkDiagnosticsNetworkAdapter


What is SIP trunking

What is SIP trunking..  (Session Initiation Protocol trunking) SIP trunking is a service that a communication provider offers. it uses the S...